DIY Coffee Roaster
for Under $100
Did you know that you can make a basic coffee roaster with simple parts from the hardware store? If you’re like me, you like to do things for yourself. Sure you can purchase some expertly roasted beans from any of our local roasters. Then again, you might as well pay some guy to change your oil and cut your hair, too. If you’re DIY inclined, roasting beans in the “TurboCrazy” is a fun weekend project. My guess is that you’ll experience simultaneous feelings of smug accomplishment and deep appreciation for those in OKC who have perfected the art of roasting coffee on a large scale. Enjoy!
WHAT YOU’LL NEED:
Turbo Oven - Preferably something that will reach 400 degrees. We found this model on amazon.com but, chances are, you may already have either of these appliances in your kitchen cabinets. You’ll just use the top element.
Stir Crazy - The classic popcorn method from the 80s. It’s not just for popcorn anymore! This will be the base of the roaster.
1 1-½"x1/16"x4' Aluminum Stock - This will act as a spacer between the Turbo Oven and the Stir Crazy. This space is essential to avoid scorching the beans.
Electric Thermometer - A basic oven thermometer with a meat probe will work for this.
(1) 7/16” socket with a ¼” drive (this is essential)
(1) 2” x ¼” 20 threaded bolt
(3) ¼” x 20 stainless nuts
(2) ¼” washers
(2) #8 machine screw + 4 nuts
(1) 1” copper cap
(1) ⅜” stainless washer

ASSEMBLY:
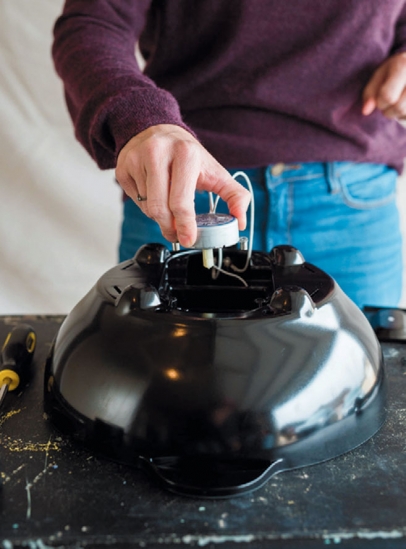
1. The Stir Crazy heater base is not necessary to roast the coffee. With the Stir Crazy unplugged, turn the unit over, take the metal back off, and disable the SC heater by disconnecting the wires from the heater terminals. Securely and individually tape the exposed wires with electrical tape. Replace the motor and metal back.
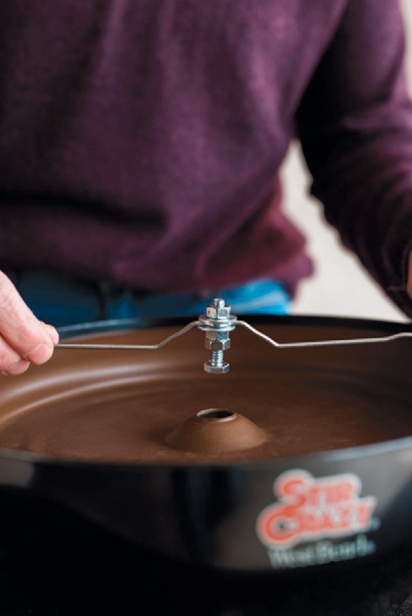
2. Replace the stir spindle. The Stir Crazy has a plastic shaft that connects the motor to the stir arm. This needs to be replaced with metal parts. You can see the metal replacement here.
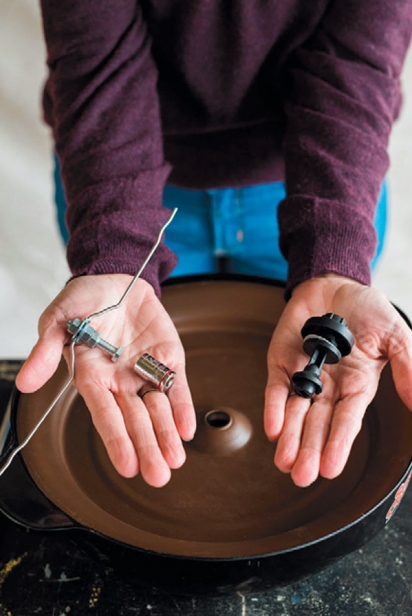
3. We used a ¼“ drive socket that fits to the Stir Crazy motor perfectly. Using the threaded bolt, assemble the new stir shaft as shown. Put pieces together- in order of pictures.
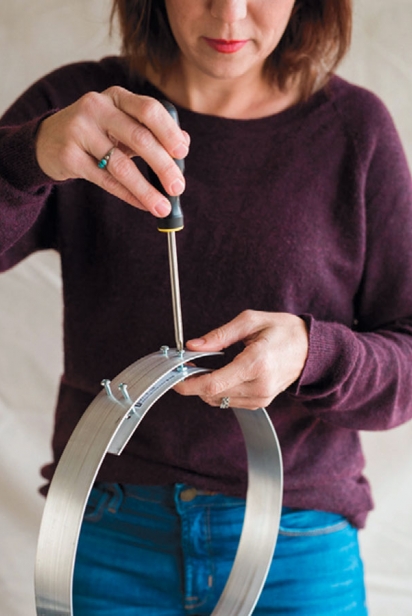
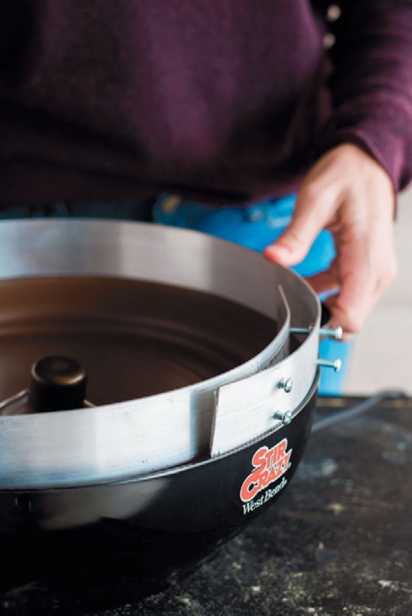
4. Gently bend the aluminum stock into a spacer ring.
5. Using a clamp to hold it to the diameter for the Stir Crazy base, drill 5/32” pilot holes for the small machine screws.
6. Place spacer ring on Stir Crazy base with opening in the direction of the air flow. Adjust the screws so chaff can be blown out. Put Turbo oven lid on and you are ready to roast!
ROASTING:
Turn on the Turbo Oven and begin heating (use digital thermometer to gage heat). While heating, weigh beans to 350- 400 grams.
When roaster heats to desired temp (usually between 350-420 degrees fahrenheit depending on bean) drop in beans and continue heating.
Watch beans as they change color and smell. Listen for the first crack in the beans.
Following the first crack watch closely as you get beans to desired color. Lighter roasts will be removed before second crack. Darker roasts need to be removed during second crack.
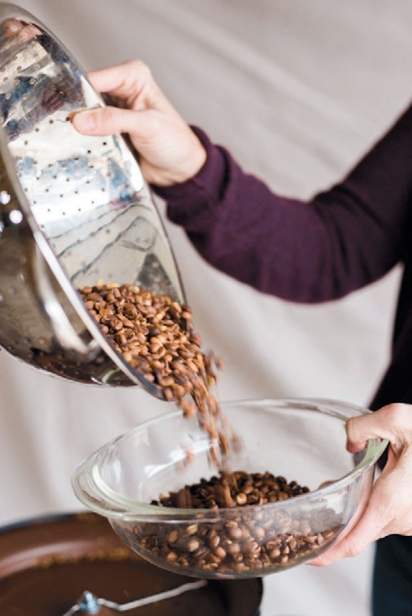
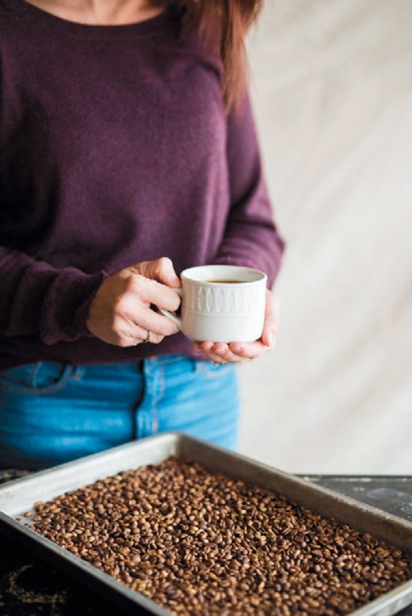
Cool your roasted beans by pouring them between bowls for 3-5 minutes. This also helps remove any extra chaff. Let your beans rest for 24 hours before enjoying your home roasted coffee.
Check out edibleokc.com for more Turbo Crazy modifications, info, roasting tips, and sources to purchase green coffee.